
The Trenches at Messines 1916-17
 |
| Royal Medical Corps at Messines by Gilbert Rogers |
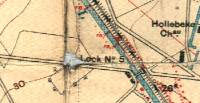
|
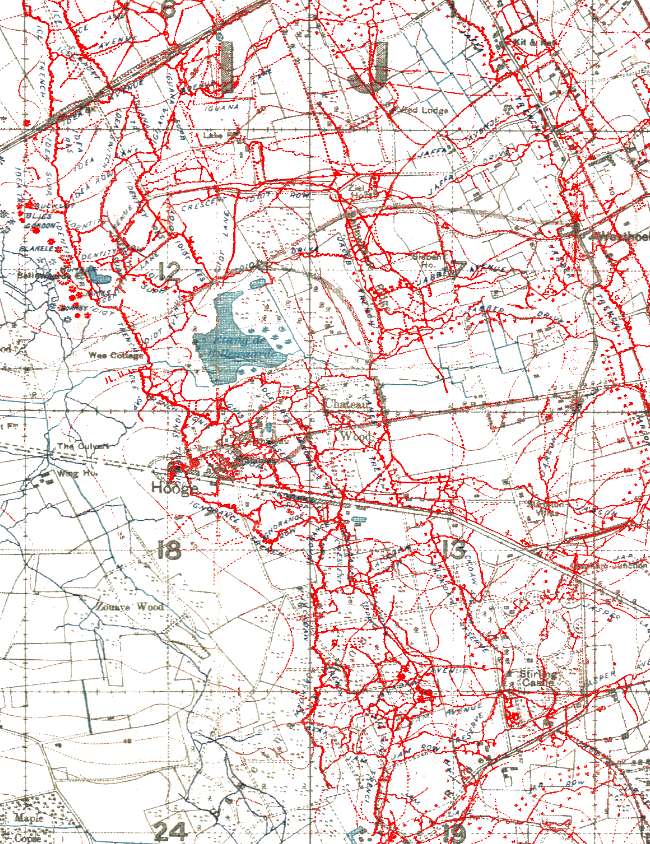
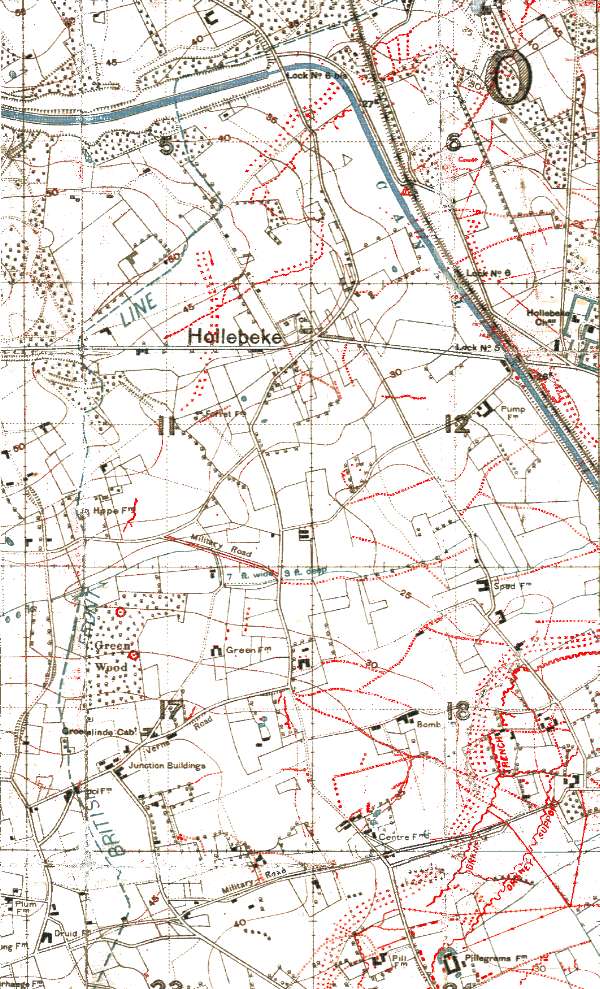
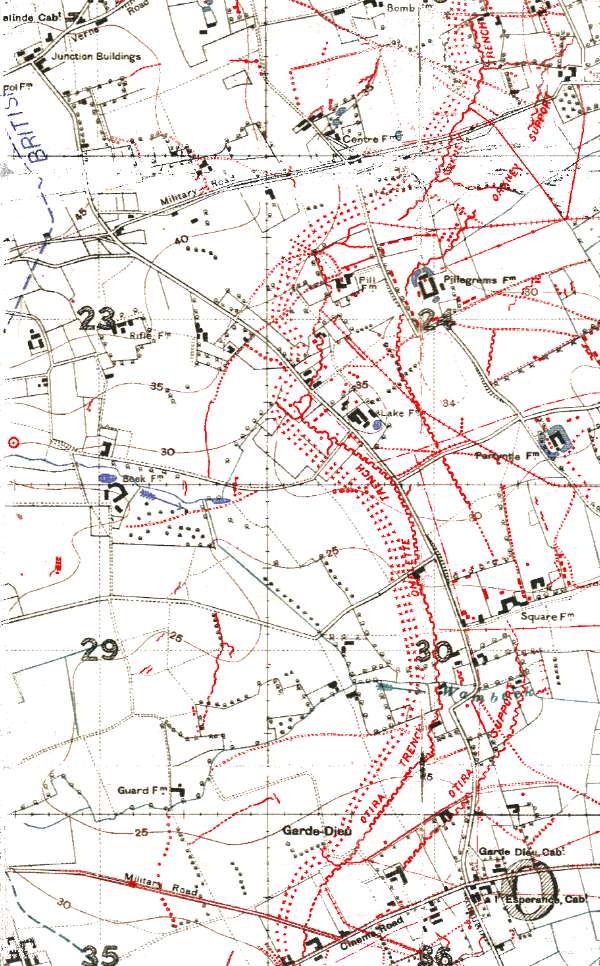
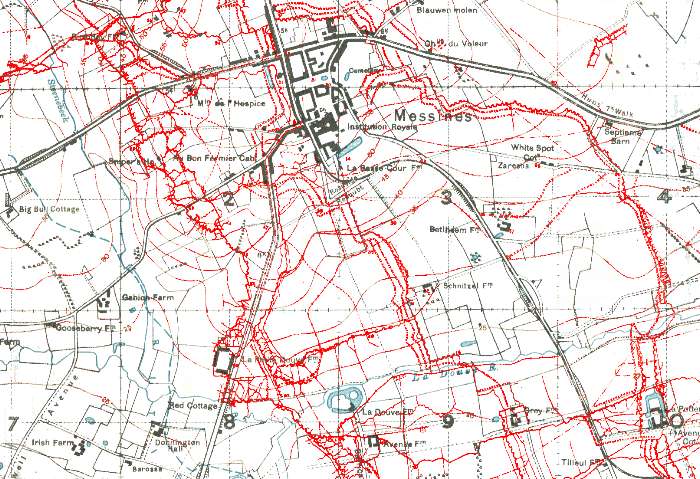
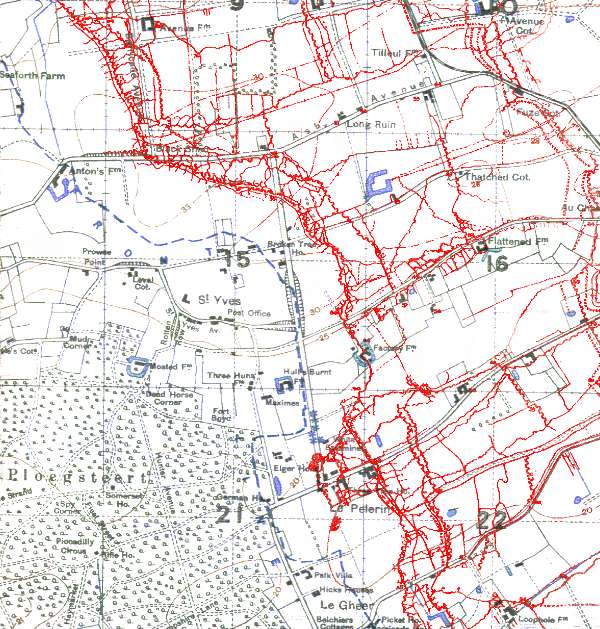
The purpose of this exhibit is to examine the trench maps in use during the First World War, not to examine the Battle for Messines. We will get around to that a little later, I promise. I have used a Battle for Messines map as the zoomable master because it contains all of the appropriate locations. The lines on this map refer to the 7-Jun-1917 time period. Many people envision two sets of simple opposing trenches running the cross section of France where enemies peered at, and occasionally bombarded each other across no-man's-land. I hope these maps help dispel that notion. While there was indeed a no-man's-land dividing Western Europe, the trenches to either side were anything but simple. By 1916 both sides had found the time and manpower to construct a complex series of fire, communication, and supply trenches. These British maps detail the German entrenchments, but, you will notice, contain almost no information on the Allied entrenchments. After all, you never know who will wind up with a map, and you certainly don't want to do your opponent's homework for him!
|

This master map is clickable.

|
Netscape 2.0 and IE 2.0 users: Just click on the area that you want to zoom.
For other browsers, select the map using the corresponding reference number from the list below:
| Trench Map Reference Information | |||||
|---|---|---|---|---|---|
| Ref no. | Area/image size | Map Title | Sheet ID | Edition | Corrected to |
| 1 | Hooge (177K) | Zillebeke | 28 NW 4 & NE 3 | 6.A | 30-Jun-1917 |
| 2 | Shrewsbury Forest (140K) | same as above | |||
| 3 | Hollebeke (157K) | Wytschaete | 28 SW 2 | 6.A | 18-Jul-1917 |
| 4 | Wambeke (133K) | same as above | |||
| 5 | Messines (100K) | Ploegsteert | 28 SW 4 | 3.D | 17-Jun-1916 |
| 6 | St. Yves (106K) | same as above | |||
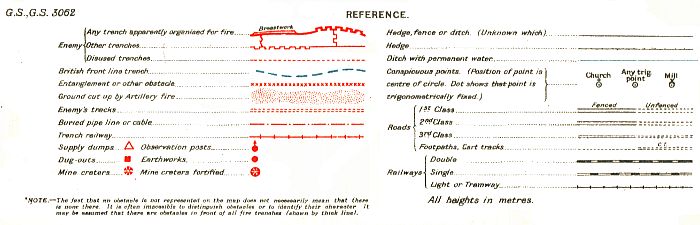
| * | Legend to Map Symbols (41K) | common to all maps | |||
A Note on Map Restoration
  Above is a before and after sample of computer image restoration. You will notice that the original scanned image (left) has yellowed with age (and it is surely entitled to that) and has incurred serious damage at the fold points towards the center of the image. The image on the right has been digitally "bleached" and the fold damage repaired. This small scale sample took me more than a half hour to accomplish. I have a new respect for those dedicated to the work of restoration. Extrapolating the half hour figure, I would be 107.5 years old by the time I finished this exhibit if I were equally as careful on the all of the trench maps included here. I have restored them reasonably considering time restraints. This means you may notice loss of detail in some spots which were damaged in a similar fashion as the example above. I think you will, for the most part, find the maps quite acceptable. One last note: JPEG compression causes reds to bleed a bit. I think it's a fair tradeoff considering the resulting file sizes. |